In today’s digital landscape, ensuring the security and integrity of your website is paramount. HTTPS and SSL are no longer optional but essential components for building trust with your users and protecting their sensitive data. This article provides a comprehensive guide on how to configure HTTPS and SSL within a Cloud Hosting environment. Whether you’re running a small blog or a large e-commerce platform, understanding the intricacies of SSL certificates and HTTPS implementation is crucial for safeguarding your online presence and enhancing user confidence.
Cloud hosting presents unique opportunities and challenges for HTTPS and SSL configuration. This guide will walk you through the process, step-by-step, explaining the key concepts and providing practical advice for implementing HTTPS and SSL in your cloud hosting environment. We’ll cover various methods, including using Let’s Encrypt for free SSL certificates, and discuss the importance of proper SSL configuration for optimal security and performance. Learn how to enable HTTPS on your cloud-hosted website and ensure a safe and secure browsing experience for your visitors.
Why SSL Matters for Cloud-Based Websites
Security is paramount in the cloud, and SSL certificates play a vital role in safeguarding cloud-based websites. SSL (Secure Sockets Layer), or its successor TLS (Transport Layer Security), encrypts the communication between a user’s browser and the web server. This encryption prevents sensitive data, such as login credentials, payment information, and personal details, from being intercepted by malicious actors.
For cloud-based websites, where data traverses a complex network infrastructure, this encryption is especially crucial. It ensures data integrity and confidentiality, protecting against eavesdropping and data breaches. Furthermore, SSL builds trust and credibility. The presence of the padlock icon and the “https” in the address bar visually assures users that the website is secure and their information is protected.
SEO benefits are another compelling reason for implementing SSL. Search engines like Google prioritize secure websites, giving them a ranking advantage. This can lead to increased visibility and organic traffic. Additionally, many modern browser features require HTTPS, such as service workers for progressive web apps, further emphasizing the importance of SSL for a modern web presence.
Choosing Between Free and Paid SSL Certificates
When setting up HTTPS for your cloud hosting, a key decision revolves around selecting the right SSL certificate. You’ll encounter two primary options: free and paid SSL certificates. Each caters to different needs and carries its own set of advantages and disadvantages.
Free SSL certificates, like Let’s Encrypt, are readily available and easy to obtain. They provide a basic level of encryption suitable for blogs, personal websites, and small projects. However, they typically offer domain validation only, meaning they verify ownership of the domain but don’t offer any organization-level authentication.
Paid SSL certificates provide a higher level of trust and assurance. They offer different validation levels, including organization validation (OV) and extended validation (EV). OV certificates verify the identity of the organization, while EV certificates provide the highest level of assurance, displaying the organization’s name directly in the browser’s address bar. This instills greater confidence in users, particularly for e-commerce websites and financial institutions. Paid certificates also come with warranties, offering financial protection in case of certificate-related issues.
The best choice depends on your specific needs and budget. For basic websites with less sensitive data, a free SSL certificate may suffice. However, if you handle sensitive information or operate an e-commerce site, a paid SSL certificate is recommended for enhanced security and user trust.
Generating and Installing SSL Certificates

Securing your cloud hosting with HTTPS requires an SSL certificate. This digital certificate authenticates your website’s identity and encrypts communication between the server and the client’s browser. There are several ways to obtain an SSL certificate.
You can generate a Certificate Signing Request (CSR) on your server. This CSR contains information about your server and your organization. You then submit this CSR to a Certificate Authority (CA).
Alternatively, many cloud hosting providers offer streamlined processes for obtaining and installing SSL certificates, often through their control panels. Some providers even offer free SSL certificates, such as Let’s Encrypt, which can be automatically installed.
Once you have the certificate, you need to install it on your server. The installation process typically involves uploading the certificate files to a specific directory on your server and configuring your web server software (e.g., Apache, Nginx) to use the certificate.
Ensure you install the correct certificate files, including the private key, certificate chain (intermediate certificates), and the primary certificate. Incorrect installation can lead to errors and security vulnerabilities.
Forcing HTTPS with .htaccess or Server Config
After installing an SSL certificate and configuring your cloud hosting for HTTPS, the next crucial step is ensuring all traffic is redirected to the secure HTTPS version of your website. This prevents users from accidentally accessing the insecure HTTP version and ensures consistent data encryption.
There are two primary methods to enforce HTTPS: modifying the .htaccess file or adjusting your server’s configuration. The .htaccess method is commonly used on Apache servers and involves adding specific rewrite rules. This method is often simpler for users with shared hosting environments.
Alternatively, modifying the server configuration directly offers more control and can be more efficient. This approach typically involves adjusting the web server software’s configuration file (e.g., httpd.conf for Apache, nginx.conf for Nginx). This method is generally recommended for users with dedicated servers or virtual private servers (VPS).
Both methods achieve the same result: redirecting all HTTP requests to HTTPS. Choose the method that aligns best with your server environment and technical expertise.
Renewing SSL Automatically with Let’s Encrypt
Let’s Encrypt certificates are valid for 90 days. This relatively short lifespan enhances security, but requires automated renewal to avoid service interruptions. Most cloud hosting providers offer automated Let’s Encrypt renewal mechanisms, simplifying the process considerably.
Typically, the hosting provider’s control panel will include an option to enable automatic renewal. Once activated, the system will attempt to renew the certificate several weeks before its expiration date. This ensures that a valid certificate is always in place, preventing potential downtime or security warnings.
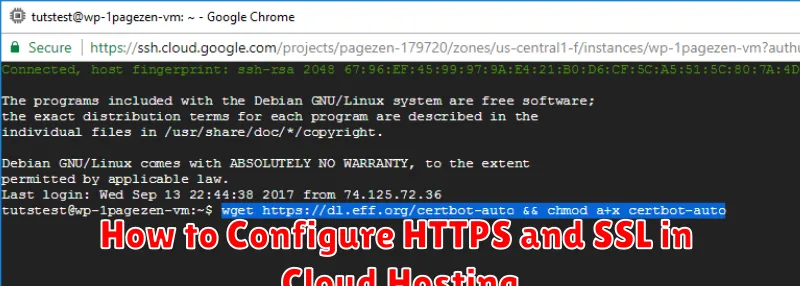
Certbot, a commonly used client for Let’s Encrypt, facilitates automated renewals. If your hosting provider doesn’t offer built-in automation, you can configure Certbot to handle renewals. This often involves setting up a cron job to run a renewal command periodically.
Regardless of the method employed, it is crucial to monitor the renewal process. Check your hosting provider’s documentation or Certbot logs to confirm successful renewals. Configure email notifications to alert you of any issues, allowing prompt intervention if necessary.
Fixing Mixed Content Errors
Mixed content errors occur when an HTTPS page loads resources, such as images, scripts, or stylesheets, over HTTP. This compromises the security of the page, as the unsecured HTTP content can be intercepted and modified by attackers. Browsers often block or warn users about mixed content, affecting the functionality and user experience of your website.
To fix mixed content errors, ensure all resources are loaded over HTTPS. The most effective method is to update all your website URLs to use HTTPS. This involves changing URLs in your website’s database, HTML, CSS, and JavaScript files. Look for instances of http:// and replace them with https://.
If you are using a Content Delivery Network (CDN), ensure it supports HTTPS and is configured correctly for your website. Additionally, check any hardcoded URLs in your website’s code and configuration files. For external resources that you don’t control, try contacting the provider and requesting an HTTPS version. If that’s not possible, consider replacing the resource with an alternative that supports HTTPS.
After implementing changes, use your browser’s developer tools (often accessed by pressing F12) to inspect the page and identify any remaining mixed content warnings. Addressing these errors is crucial for maintaining a secure and functional HTTPS website.
SSL in Load-Balanced Environments

In load-balanced environments, configuring SSL requires careful consideration of where to terminate the SSL connection. There are two primary approaches: terminating SSL at the load balancer or terminating SSL at the individual web servers.
Load Balancer Termination: This is the more common and often preferred approach. The load balancer decrypts the HTTPS traffic and then distributes the unencrypted requests to the backend web servers. This simplifies configuration on the web servers and allows the load balancer to manage SSL certificates and encryption/decryption overhead. However, communication between the load balancer and web servers is typically unencrypted unless additional security measures are implemented.
Web Server Termination: In this scenario, each web server terminates the SSL connection. This provides end-to-end encryption but requires each web server to manage its own SSL certificates and handle the processing overhead of encryption/decryption. This can be more complex to manage, especially with a large number of web servers.
Choosing the right approach depends on factors such as security requirements, performance considerations, and the complexity of the infrastructure.

